Try Now

How to schedule deletion of Cache

This guide will help you set up cache lifespan, Cache lifespan in SpeedyCache invalidates the cache files after it has reached its lifespan.

To set-up cache lifespan you follow the steps given below :- 

  • Go to SpeedyCache page from the WordPress admin left navigation.
  • Once you are on the SpeedyCache page, go to Cache Tab.
  • In cache tab, at the bottom of that tab you will find cache lifespan input field.
  • There are 2 options which you can set, the first is the quantity of time like 24, 1 and the second is the unit of time like days and hours.
  • After setting the values according to your need, you should save the settings.

Note: To unset or stop cache lifespan you can set the number field to 0.

See the below GIF for better understanding.
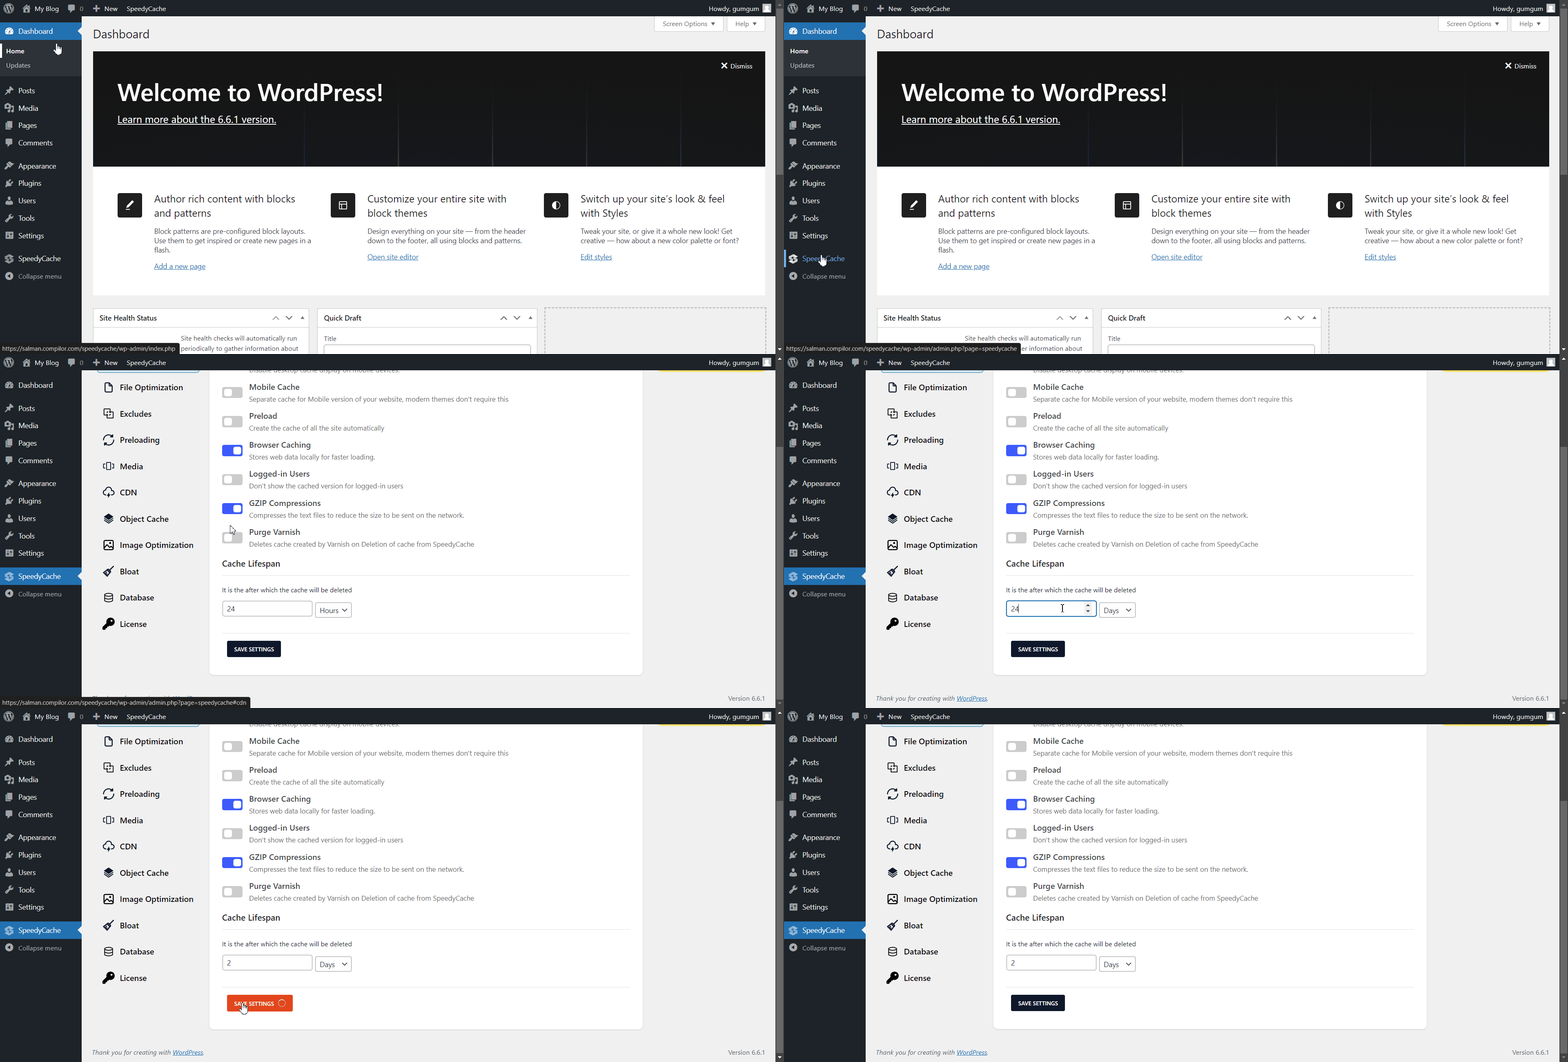
Setting Cache Lifespan
    Was this page helpful?
    Newsletter Subscription
    Subscribing you to the mailing list